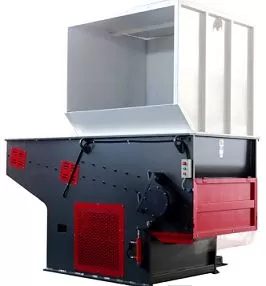
When it comes to maintaining the efficiency and longevity of your plastic shredder, one of the most critical tasks is changing the blades. Especially in a single-shaft shredder machine, which plays a pivotal role in recycling and managing plastic waste, ensuring the blades are in top condition is non-negotiable.

But how exactly do you change the blades on a single-shaft shredder machine? It’s a process that requires precision, safety, and the right tools. In this post, I’ll guide you through each step, ensuring you can perform this essential maintenance task with confidence.
Maintaining your shredder’s blades not only prolongs the machine’s life but also ensures it operates at peak efficiency. Let’s dive in.
Why is Regular Blade Maintenance Crucial?
Blade maintenance is not just about keeping your machine running smoothly; it’s about ensuring the quality of the shredded material and reducing downtime. A dull blade can lead to uneven shredding, increased energy consumption, and potential damage to the machine.
What Tools Do You Need?
Before you start, ensure you have all the necessary tools. You’ll need a wrench set, a screwdriver, a hammer, and possibly a blade removal tool, depending on your machine’s model. Also, don’t forget safety equipment, including gloves and eye protection.
How to Prepare Your Shredder for Blade Replacement?
Safety first. Always disconnect the power supply before beginning any maintenance work on your shredder. This can’t be overstated. Once the machine is powered off, open the shredder’s housing according to the manufacturer‘s instructions. This step is crucial for accessing the blades safely.
Step-by-Step Guide to Changing the Blades
- Identify the Blades to Be Changed: Not all blades might need replacement. Inspect each blade for wear and tear, looking for signs of dullness or damage.
- Loosen the Fixing Screws: Using your wrench and screwdriver, loosen the screws or bolts that secure the blades to the shaft. This might require some elbow grease.
- Remove the Old Blades: Once the screws are loosened, carefully remove the blades from the shaft. Some models may require a blade removal tool for this step.
- Install the New Blades: Place the new blades onto the shaft, ensuring they are positioned correctly. Secure them in place by tightening the screws or bolts. Be sure not to over-tighten, as this could strip the threads or damage the blade.
Testing and Adjustments
After installing the new blades, it’s crucial to test the machine for proper operation. Power on the shredder and run it empty for a few minutes to ensure everything is working smoothly. Listen for any unusual noises and make any necessary adjustments.
When to Seek Professional Help?
While changing the blades on a single-shaft shredder machine is a task many can undertake, there are times when it’s best to seek professional help. If you encounter any complications or if your shredder requires specialized tools or knowledge, don’t hesitate to contact a professional technician.
Conclusion
Changing the blades on your single-shaft shredder machine is a vital maintenance task that ensures your equipment runs efficiently and continues to serve its purpose in the recycling process. By following the steps outlined in this guide, you can perform this task safely and effectively. Remember, regular maintenance not only extends the life of your machine but also contributes to a more sustainable environment.
That’s how we, at Amige, approach our commitment to innovation and sustainability, ensuring our products like plastic shredders remain at the forefront of technology and efficiency.
